LightBlog

mercredi 4 août 2021

Motorola Edge 20, POCO X3 GT, Huawei P50, and more forums are now open

Last week we saw some exciting new hardware coming out from Huawei, ZTE, Motorola, and Nokia. ZTE showcased the Axon 30 with an improved under-display camera while Huawei made a strong statement with the launch of its new P50 series, promising “new breakthrough tech in mobile imaging.” Nokia unveiled a tough phone that promises to last for years with 2 years of warranty and 4 years of software support. After weeks of leaks, Motorola also finally unveiled the new Motorola Edge 20 series.

We have opened up XDA forums for all the above-mentioned devices to make it easier for users to stay up to date with the latest developments and news around their devices, connect with fellow users, and collaborate on aftermarket projects.
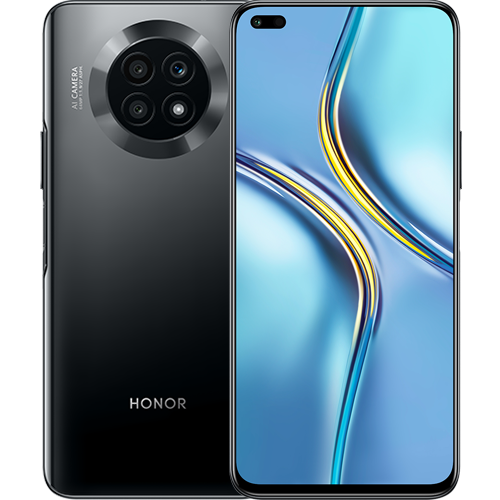
POCO X3 GT

The POCO X3 GT is the latest mid-ranger from Xiaomi’s sub-brand. It’s not a brand new device per se but a rebranded version of the Chinese Redmi Note 10 Pro 5G. This shouldn’t be an issue for users, though, as both phones don’t co-exist in the same market — unlike the Redmi Note 10T and POCO M3 Pro. For what it’s worth, it offers great value for money, packing a massive battery, capable cameras, and flagship-level haptics for just $299.

POCO X3 GT XDA Forums

Motorola Edge 20 series

Motorola’s latest Edge 20 series consists of three phones: the Motorola Edge 20, Edge 20 Pro, and Edge 20 Lite. The regular Motorola Edge 20 and Edge 20 Pro models aim for lucrative premium mid-range and affordable flagship markets. Meanwhile, the Edge 20 Lite makes a solid case for a budget-friendly phone. All three phones pack high refresh rate OLED panels, a 108MP primary camera, a 32MP selfies shooter, large batteries with 30W fast charging support, and a near-stock Android 11 experience.

Motorola Edge 20 XDA Forums

Motorola Edge 20 Pro XDA Forums

Motorola Edge 20 Lite XDA Forums

Huawei P50 series

Last week, Huawei took the wraps off its latest flagship series featuring the Huawei P50 and P50 Pro. The vanilla Huawei P50 flaunts a 6.5-inch FHD+ OLED panel, with the Snapdragon 888 4G SoC powering the phone from the inside and a 50MP primary shooter, 13MP ultra-wide cam, and a 12MP telephoto lens handling the camera duty. On the other hand, the Pro model features a 6.6-inch OLED panel, Snapdragon 888 4G/Kirin 9000 SoC, and an additional 40MP monochrome sensor for better low-light photography. It also has a slightly larger battery than the regular model. Check out our launch coverage for more details.

Huawei P50 XDA Forums

Huawei P50 Pro XDA Forums

Nokia XR20

The Nokia XR20 is unlike anything we have seen from HMD Global. The new Nokia XR20 is designed to last long and has a ruggedized body built to military standard MIL-STD-810H. HMD Global says it can withstand falls from up to 1.8 meters, survive underwater for up to an hour, and will continue to work even in extreme environments. Further backing the longevity claim is an extended 2-year warranty and up to 4 years of software support, including 3 guaranteed Android OS updates.

Nokia XR20 XDA Forums

ZTE Axon 30

With the Axon 30, ZTE is taking another shot at the under-display camera tech, having failed the first time with the Axon 20. ZTE says the new under-display camera technology used in the Axon 30 fixes all the issues that plagued its predecessor. We’ll have to wait and see whether these claims hold up in real life. To learn more about the new under-display camera and other features of the phone, check out our launch coverage.

ZTE Axon 30 XDA Forums

Nokia C30

The Nokia C30 is the latest entry-level offering from HMD Global. The phone runs Android 11 Go edition and packs a large 6.82-inch HD+ LCD, Unisoc SC9863A octa-core chipset, 2GB/3GB RAM, 32GB/64GB storage, a 13MP primary shooter, and a 6,000mAh battery.

Nokia C30 XDA Forums

The post Motorola Edge 20, POCO X3 GT, Huawei P50, and more forums are now open appeared first on xda-developers.


from xda-developers https://ift.tt/3A4rc66
via IFTTT

Samsung’s mid-range Galaxy Tab S7 FE tablet comes to the US in two models

After launching the Galaxy Tab S7 FE in the European and Indian markets earlier this year, Samsung is now finally bringing the mid-range tablet to the US. The Fan Edition model is a toned-down version of Samsung’s flagship Galaxy Tab S7 Pro, and it features a similar design, mid-range hardware, and an affordable price.

Samsung Galaxy Tab S7 FE: Specifications

Specification Samsung Galaxy Tab S7 FE 5G  Samsung Galaxy Tab S7 FE WiFi
Build
  • Metal unibody
  • Metal unibody
Dimensions & Weight
  • 7.28 x 11.21 x 0.25″
  • 1.34lb
  • 7.28 x 11.21 x 0.25″
  • 1.34lb
Display 12.4″ 2560 x 1600 TFT LCD 12.4″ 2560 x 1600 TFT LCD
SoC Qualcomm Snapdragon 750G NA
RAM & Storage
  • 4GB RAM
  • 64GB storage
  • microSD card support (up to 1TB)
  • 4GB RAM
  • 64GB storage
  • microSD card support (up to 1TB)
Battery & Charging
  • 10,090mAh
  • 25W fast charging support
  • 10,090mAh
  • 25W fast charging support
Security Software-enabled Face Unlock  Software-enabled Face Unlock
Rear Camera(s) 8MP, AF 8MP, AF
Front Camera(s) 5MP 5MP
Port(s) USB 3.2 Gen 1 Type-C USB 3.2 Gen 1 Type-C
Audio
  • Stereo speakers
  • Tuned by AKG
  • Dolby Atmos support
  • Stereo speakers
  • Tuned by AKG
  • Dolby Atmos support
Connectivity
  • 5G
  • 802.11 a/b/g/n/ac dual-band WiFi
  • Bluetooth 5.0
  • 802.11 a/b/g/n/ac dual-band WiFi
  • Bluetooth 5.0
Software One UI based on Android 11 One UI based on Android 11
Colors Mystic Black Mystic Black, Mystic Silver, Mystic Green, Mystic Pink

While Samsung only launched the cellular version of the Galaxy Tab S7 FE in Europe and India, the company has launched both the 5G and WiFi-only variants in the US. The 5G variant is the same as the one available in international markets, featuring Qualcomm’s Snapdragon 750G chip, a 12.4-inch TFT display, a massive 10,090mAh battery, and a sleek all-metal design. The Wi-Fi variant, on the other hand, loses out of cellular connectivity and packs a different SoC.

Samsung Galaxy Tab S7 FE with S Pen front Samsung Galaxy Tab S7 FE with S Pen back

Elsewhere, the two variants are the same, featuring 4GB of RAM, 64GB of onboard storage, a microSD card slot for expansion up to 1TB, and a stereo speaker setup tuned by AKG. The tablets also feature an 8MP rear-facing camera, a 5MP front-facing camera, and a USB 3.2 Gen 1 Type-C port for charging and data syncing. Other connectivity options 802.11 a/b/g/n/ac dual-band Wi-Fi and Bluetooth 5.0. Both tablets also come with an S Pen in the box.

Samsung Galaxy Tab S7 FE WiFi colors

On the software front, the tablet runs Samsung’s One UI skin on top of Android 11. The software features a ton of useful features, like DeX mode, and it also comes with a couple of pre-loaded creativity apps like Canva and Clip Studio Paint.

Samsung Galaxy Tab S7 FE XDA Forums

Pricing & Availability

The 5G variant of the Galaxy Tab S7 FE starts at $669, and it will be available through Samsung’s website, AT&T, and Verizon starting August 5th. The tablet will also be available through other retailers, T-Mobile and US Cellular, soon. The WiFi-only model starts at $529.99, and it will be available for pre-order on Samsung’s website on August 5th, with sales beginning early in September. Early buyers will receive an additional $80 Samsung credit with each purchase.

Samsung Galaxy Tab S7 FE XDA Review

The Samsung Galaxy Tab S7 FE 5G will be available in one colorway — Mystic Black. However, the WiFi-only model will come in four colorways — Mystic Black, Mystic Silver, Mystic Green, and Mystic Pink.

The post Samsung’s mid-range Galaxy Tab S7 FE tablet comes to the US in two models appeared first on xda-developers.


from xda-developers https://ift.tt/3fwWXwN
via IFTTT

JetBrains Compose for Desktop and Web is now in alpha

If you haven’t heard of Jetpack Compose, where have you been lately? Google created this declarative UI framework to replace the standard XML layout engine in Android. Compose lets developers create their layouts and accompanying logic all in Kotlin. JetBrains, the company behind Kotlin, also got in on the Compose action and is working on porting it to both desktop and the web.

JetBrains Compose for Desktop and Web has been in development for a while now. It’s had a public pre-alpha “Technology Preview” that developers can use to create cross-platform apps in Compose. I’ve personally used it for my Samsung Firmware Downloader app, and it works pretty well.

Today, JetBrains is promoting its version of Compose to alpha. That means a more stable API, along with some new features and changes.

Compose for Web

First up, the web. Compose for Web is even newer than Compose for Desktop, and it’s missing quite a bit. That doesn’t mean it’s useless, though. While developers may not get the fancy core UI elements available for Desktop and Android, developers do still get the benefits of writing in Kotlin with declarative design principles.

Now that Compose is in an alpha stage, the Web API should be more stable, with fewer, if any, breaking changes made over time.

Compose Window Management

Back to Desktop, there are some changes to how developers interact with windows in their app.

The first is a new composable window API. This lets developers interact with the windows in their app in declaratively. For example, the window title can now be changed with a state, and windows can even be opened and closed based on states.

Another part of the new window API lets developers choose to have new windows open with an adaptive (instead of fixed) size. This means that Compose will calculate how big a window needs to be based on its content, automatically set the initial size, and then open the window.

Plugins

JetBrains Compose has always had a Gradle plugin to perform compilation and execution. With the alpha, this plugin is getting a version bump, along with some bug fixes.

On top of the Gradle plugin, though, there’s now an IDE plugin for IntelliJ IDEA and Android Studio to better support Compose for Desktop and Web. Similarly to Compose for Android, this plugin lets developers annotate composable functions as previews and view layout previews directly in the IDE.

The plugin is very basic right now. The only other feature it has right now removes the IDE lint warning about using title case for composable function names. But it’s going to get more features as time goes on, such as live preview.

Architecture Support

Even though the goal for JetBrains Compose is to be cross-platform, it doesn’t quite have full support for all CPU architectures yet. The alpha expands the current support to the following:

  • macOS: x86-64 (amd64), arm64
  • Windows: x86-64 (amd64)
  • Linux: x86-64 (amd64), arm64
  • Web: anything recent

While that certainly doesn’t cover everything out there, support is only going to get better in the future.

Future Developments

JetBrains’ choice to move Compose into an alpha state is important. It means that they’re planning to continue developing for it, with eventual beta and stable stages. And, of course, more features.

Conclusion

It’s pretty exciting to see what Compose has to bring. On Android, it replaces an outdated (although perfectly usable) layout engine. On Desktop and Web, it brings declarative design using a strongly-typed language that’s easier to use (at least for me) than TypeScript-based languages. Especially on Desktop, Compose helps to fill a pretty large gap for functional layout engines.

If you’re interested in trying out JetBrains Compose yourself, check out the GitHub repository for more details on how to get started.

The post JetBrains Compose for Desktop and Web is now in alpha appeared first on xda-developers.


from xda-developers https://ift.tt/3lvbXiD
via IFTTT

Google leaks its 2021 Nest Cam lineup and battery-powered Nest Doorbell

Google plans to launch a new range of Nest security cameras this year. Earlier this year, the company confirmed that it would “keep investing in new innovations” such as a “new lineup of security cameras for 2021.” While it didn’t share any details at the time, the company has now preemptively set up listings for the upcoming devices on the Google Store.

As per a recent report from Droid Life, Google has listed four upcoming Nest devices — Nest Cam (battery), Nest Cam (wired), Nest Cam with floodlight, and Nest Doorbell (battery) — on the Google Store ahead of the official launch. The listings only confirm the names of the devices and show us what they look like, but they don’t include any specifications or pricing details.

Google Store screenshot showing new Nest Cameras

(Screenshot: The Verge)

As you can see in the attached images, the new Nest Cam (battery) and Nest Cam (wired) feature a design similar to the older Nest Cam IQ outdoor model. But Google seems to have made some refinements to the mounting hardware. The Nest Cam with floodlight also follows the same design language, but it features large floodlights on either side.

Google Store screenshot showing new Nest Doorbell

(Screenshot: The Verge)

The new Nest Doorbell features the same design as the existing wired Nest Doorbell, but it looks taller and has a different color scheme. We’ve already seen the backplate of the Nest Doorbell in a previous leak, and it will feature a USB Type-C port, two mounting screws, and a silver circular button at the bottom.

According to The Verge, the “Learn More” and “Buy” links on these new Nest devices redirect to the Google Store homepage at the moment. Currently, Google hasn’t made an official announcement regarding these devices, but since the listings are now live, we believe that an announcement could come anytime soon. We’ll make sure to let you know as soon as the new Nest devices go on sale.

The post Google leaks its 2021 Nest Cam lineup and battery-powered Nest Doorbell appeared first on xda-developers.


from xda-developers https://ift.tt/3Abc86I
via IFTTT

Download Android USB Drivers for popular OEMs

So you’ve got an Android device and want to dive deep into the world of modding? Be it rooting or installing a custom ROM like LineageOS, most of the aftermarket modding requires you to connect your Android smartphone to a computer using a USB cable so you can use tools like the Android Debug Bridge (ADB) and Fastboot to interact with the device. For an Android power user, you may also want to reinstall the factory firmware on your phone, which means you have to deal with the OEM-specific flashing utilities.

However, none of these tinkering jobs are possible if your PC can’t see the target device in the first place. As in the case of Windows, the operating system may require an additional piece of software known as the “driver” in order to properly recognize all the different connection modes exposed by the Android device. Below you can find a list of official OEM-provided Android USB driver packages and a generic driver installation guide. If you don’t see the maker of your device listed or you see a misplaced link, send a message to Skanda Hazarika (SkandaH on the forums) with the device details.

android_usb

Table of Contents:

Purpose of Android USB drivers

The USB interface of an Android device is a pretty complex object. Depending on the configuration, it may expose the standard Android USB debugging interface, the fastboot interface, and various other SoC-specific diagnostic interfaces to the computer. Simultaneously maintaining more than one interface is supported as well, e.g. you can interact with your device with ADB while configuring the internal modem parameters.

Keep in mind the aforementioned scenarios are a bit different from connecting the device through the plain old Media Transfer Protocol (MTP) or Picture Transfer Protocol (PTP) mode. MTP enables the end-user to browse the internal memory on the device from a PC as if it’s an external storage drive. Microsoft ships a generic MTP/PTP driver with every edition of Windows since Windows XP, so you don’t need an external driver for that.

Download Android USB drivers for popular OEMs

Most Android OEMs offer official driver packages for their devices. Besides the ADB and Fastboot interfaces, these drivers also support proprietary flashing protocols designed by the corresponding device maker. For example, if you want to flash a Samsung Galaxy device, you must install the Samsung USB driver package beforehand.

Note that Microsoft has been shipping a generic ADB driver with Windows for a while, so installing the OEM driver just for the sake of USB debugging might not sound worthwhile anymore. Windows can also check and install the missing drivers on the fly through Windows Update. However, Microsoft-recommended drivers are not always the best choice for complex USB interfaces, so do check out the official driver pack whenever possible.

Windows generic ADB driver

The inbox Android USB debugging driver of Windows in action

Get the appropriate driver for your device from the index below:

How to install Android USB drivers

Now that you’ve downloaded the suitable driver package for your device, it’s time for you to install it. Some OEMs offer standard installer executables, which means you can easily install the whole driver suite by double-clicking on the setup file and following the wizard.

Samsung Android USB driver

However, Google and a few other vendors prefer to stick with the bare INF and associated binary files which are packed inside a zip or rar archive. Such packages need to be installed using Device Manager, but you have to extract the contents of the archive beforehand.

  • Right-click on the Start button and select the Device Manager entry. You can also call the Microsoft Management Console snap-in named devmgmt.msc directly from Run to open Device Manager.
Device Manager from Start button right click menu Device Manager from Run
Device Manager under Windows 10

Device Manager under Windows 10

  • Connect the Android device to your PC. Depending on the selected configuration, you may see one or more unknown devices popping up.

Unknown Android device in Device Manager

  • (Optional) Right-click on the unknown device entry, select Properties, move to the Details tab, and finally select Hardware Ids from the dropdown menu. Now open your favorite search engine, paste the hardware identifier in the search box, and go through the search results. This is a crude way to determine the probable interface your device is currently exposing.

Device Manager Hardware Ids

  • Right-click on the unknown device entry and select Update drivers. Now select Browse my computer for drivers/driver software and point the wizard to the folder where you extracted the driver package.
Browse my computer for drivers Browse for drivers on your computer
  • If everything goes right, you should see a confirmation page like the following.

Device Manager successful driver installation

Manually install the driver for an unsupported device

On some occasions, the OEM drivers aren’t enough. Perhaps you’ve stumbled upon a no-name generic tablet, or the flash mode interface of your shiny new phone has yet to get an official driver from its maker. In that case, you can forcibly install an existing driver package for a similar USB interface through Device Manager.

  • Open Device Manager and locate the unknown device entry.
  • Right-click on it and select Update drivers. Select Browse my computer for driver software and then choose the option named Let me pick from a list of available drivers on my computer.

Let me pick from a list of available drivers

  • Now select Show All Devices and click Next. On the next screen, click on the Have Disk… button.
Device Manager show all devices Device Manager Have Disk
  • At this point, you need to browse to the location where the extracted driver for a similar device is located. Pick the INF file from the list of files and select Open.

Device Manager selecting driver INF

  • Now carefully choose the driver model. For example, if you’re trying to install the Fastboot mode driver for a device, select the Android Bootloader Interface from Google’s driver set. Windows might show a warning related to compatibility, but you can ignore it and continue the installation process anyway.
Device Manager select driver model Device Manager driver compatibility warning
  • That’s it!

This method lets you force-install a signed driver without breaking its digital signature, so you don’t need to turn off driver signature enforcement on a 64-bit Windows instance.


You’ve now got the correct USB driver installed on your computer and your Android device is ready to receive instructions. Now it’s time to put it all together and run your first ADB command!

The post Download Android USB Drivers for popular OEMs appeared first on xda-developers.


from xda-developers https://ift.tt/3xjuzUV
via IFTTT

How to Unroot your Android phone

Do you want to root your Android smartphone so you can unleash the true power of your device? Thankfully, the process isn’t as difficult as you may think. But what happens when things change and you find you just don’t use root applications as much as you thought you would? If you’re in a situation like this, unrooting your phone actually makes sense. In this tutorial, you’ll learn how to unroot any Android device.

Table of Contents:

What is Unrooting?

Unrooting an Android device is the process of retracting all the elevated permissions and access as a root user. Since rooting usually involves modifying the boot partition, you might just want to unroot to take an over-the-air update because it would otherwise fail on a tampered system. Or perhaps you’re trying to sell your device, so you need to restore it to factory settings.

Whatever your reasons are, removing root access isn’t that difficult – as long as you follow the correct procedure.

How to unroot

Like rooting, there are a few different methods of unrooting your phone, and which one you choose depends on the maker of the target device, the version of Android installed on the device, and of course, the method of rooting.

Unroot by uninstalling Magisk

Since there aren’t many alternatives to Magisk when it comes to rooting, your only real option for unrooting is to remove any traces of Magisk from your device. Thankfully, you have two methods you can pick from.

1. Uninstall Magisk from the app

To fully unroot a device originally rooted using Magisk, the most straightforward way is to opt for the built-in “Uninstall” option available on the application itself. After tapping the button, you’ll be greeted with the option to restore the stock partition images and completely uninstall Magisk. To remove Magisk and all modules, tap on “COMPLETE UNINSTALL”.

Magisk app Uninstall option Magisk Uninstall button complete

The Magisk app will run the necessary scripts to remove Magisk from your phone and restore your device’s original boot image. As soon as the process ends, the phone will automatically reboot and you’re finished.

Magisk Uninstall from app

2. Uninstall Magisk from TWRP

In case you can’t boot to Android, but have access to a custom recovery like TWRP, you can still uninstall Magisk. To do so, rename the Magisk APK to uninstall.zip, boot to recovery mode, and flash it like any other ordinary flashable zip.

Magisk uninstall ZIP Magisk uninstall TWRP

Unroot by flashing the original boot image

Magisk always creates a backup of the stock boot image before patching it. As a result, you can use the Magisk app to restore the backup as shown below. You may need to manually reboot the phone in order for the changes to take effect.

Magisk Uninstall button restore image

In case you have access to the factory firmware of the exact build installed on your phone prior to rooting, you can also extract the stock boot image and flash it manually to regain the unrooted status. On most devices, you may end up with a file named boot.img which can be flashed using the regular Fastboot utility. However, OEMs like Samsung need special utilities to flash the factory firmware — the details of which are out of the scope of this article.

Unroot by installing an OTA update

Another method to unroot is to install an official OTA update. Google, OnePlus, Xiaomi, and many other Android OEMs offer official download repositories that contain full (i.e. non-incremental) OTA ZIP packages. This is also true for most custom ROMs such as LineageOS. As the full update package can always rewrite the underlying firmware — no matter how far modified it is — end users can utilize this method to restore the stock partition images and get unrooted.

You just have to pick the appropriate OTA ZIP file for your device and install it through the built-in update installer of the OS or using the recovery mode. This is probably the best way to restore your phone if you don’t like mucking around in the Magisk app.

Unroot by installing the stock firmware

While the aforementioned methods of unrooting should theoretically work just fine on devices that have been rooted using the systemless method, it’s still good to know what to do in a situation where restoring the stock boot image may not be able to fully unroot the device. Perhaps you caught up with a bootloop, or you messed up your Wi-Fi connectivity by restoring a wrong boot image?

The good news is reinstalling the stock firmware should do the trick. You’ll need to download the factory image for your device. For Pixel devices, this is provided by Google. Other device images should be provided by their manufacturer. Then use the OEM-described method to install the device software and start from scratch. Keep in mind you will lose your personal data if you follow this route without taking an off-site backup beforehand.

Verification

At this point, you can double-check the root status of the device by using the Magisk app. If its status comes back as not installed, then you’re done!

Magisk not installed

You can also use an app named Root Checker to do the job. Once installed, open the app and check the status section under the “VERIFY ROOT” tab. You should see something like the following if you’re unrooted.

Root Checker unrooted

Root Checker (Free+, Google Play) →


And that’s it! Unrooting your phone is an easier task than rooting, and we hope our guide made the process even easier for you to understand and follow.

The post How to Unroot your Android phone appeared first on xda-developers.


from xda-developers https://ift.tt/2Vkfw0g
via IFTTT

Honor X20 confirmed to launch alongside Magic 3 series next week

After splitting up with Huawei, Honor has acted quickly to get back on its feet, inking partnerships with chipmakers like Qualcomm and MediaTek, restoring the Android license, and going on a launching spree with a series of smartphone announcements. In June, Honor unveiled the Honor X20 SE in China, and it appears the company is looking to add another member to the X20 lineup.

In a Weibo post earlier today, Honor announced the launch date (via GSMArena) for the Honor X20. The company even shared key specifications as well as renders showcasing the overall design of the phone. As far as the design is concerned, the Honor X20 looks to be a clear departure from the Honor X20 SE. As you can see in the images below, it has a dual-punch hole display on the front and a giant circular camera island on the back in the upper half that looks a lot like the Huawei Mate 30 Pro.

Honor X20 in two colors

We don’t know the screen size, but Honor did confirm the display offers a 120Hz refresh rate. Other specs confirmed by Honor include a 64MP primary shooter, 5G support, an unspecified 6nm chipset, and support for 66W wired fast charging. Separately, known leaker Evan Blass has also shared high-quality renders, which give us a closer look at the phone’s design and confirms the phone will be available in at least three colors: black, blue, and white.

Honor X20 in black color showing front and back

The Honor X20 will launch in China on August 12. At the same event, Honor will also take wraps off the Magic 3 series, Honor’s first proper flagship after separation from Huawei. The Honor Magic 3 series will be powered by Qualcomm’s top-of-the-line Snapdragon 888 Plus SoC and feature multiple camera sensors on the back. Not much is known about the Magic 3 series, but with the official launch event just eight days away at this point, we won’t have to wait too long to find out what Honor has in store for us.

The post Honor X20 confirmed to launch alongside Magic 3 series next week appeared first on xda-developers.


from xda-developers https://ift.tt/2Vkc31K
via IFTTT