For Google’s flagship in 2020, the company had decidedly stepped back from the ultra-premium category of smartphones, which usually costs customers north of $1,000 USD. It seems that Google’s current mantra insists that it doesn’t require bleeding-edge hardware to create a helpful handset. But whether or not the Google Pixel 5 can be competitive with other company’s flagships is its own point of discussion that we covered in our full review. I’m here to just talk about the single most expensive piece of hardware in modern phones: the display.
My Google Pixel 5 was personally bought straight from the Google Store. Google did not compensate for this review in any way.![]()
Google Pixel 5 Display Review Highlights
- Outstanding near-black tone control (no black clipping)
- Decent color accuracy and contrast
- Excellent white point and grayscale precision
- Decent peak brightness
- Excellent HDR10 reproduction
- Peak brightness still behind equally-priced competition
- Slight loss of contrast and saturation at low brightness
- Omission of AmbientEQ
- More black smearing than current flagship OLEDs
Table of Contents
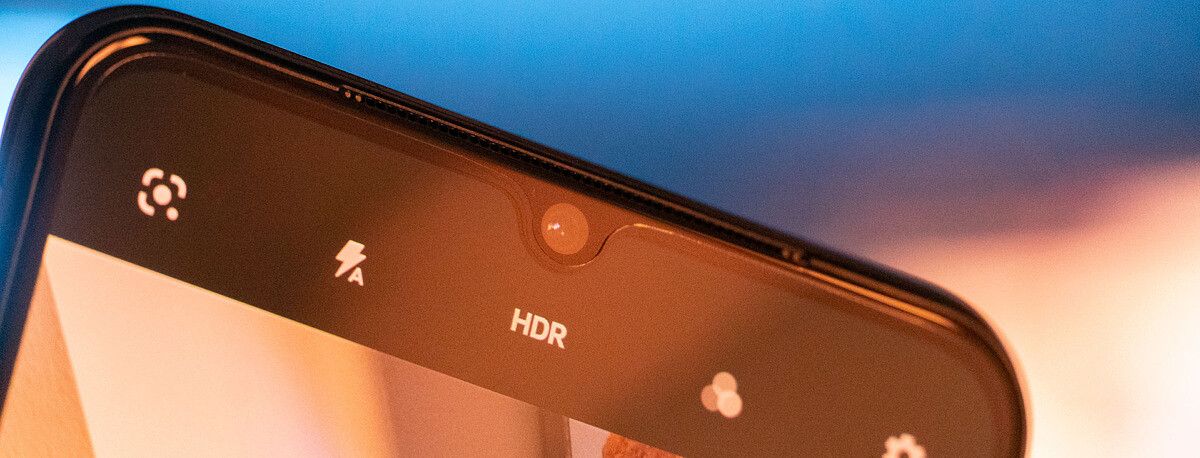
The Google Pixel 5 immediately stands out from its predecessors in an unanticipated way: It actually takes on a modern display form factor, with an edge-to-edge display with truly uniform bezels, about 4 mm for each side, which is uncommon for Android phones. Google continues to use a flexible OLED substrate for its flagship, which can be made thinner and be made to have better viewing angles and polarization characteristics compared to the rigid OLED that they use in their mid-range Pixel a-lineup. The thinness of the flexible OLED also increases optical clarity by bringing the emissive pixels closer to the cover glass (thus closer to your fingertips), which helps the screen appear more paper-like and inky. Most modern flagship OLEDs have been made of a flexible substrate for the past couple of years, but it is important to make this distinction since its optical advantage does not show up in current display measurements. Additionally, the front camera cut-out on the Google Pixel 5 appears flush with the display, while the camera on the Pixel 4a appears slightly raised compared to the screen with a noticeable silver ring around the component.
The Pixel 5’s 6-inch display size may lead some to believe that this is a plus-sized device, but it is very much still a relatively-compact device. The body of the Google Pixel 5 is actually about the same size as all of its smaller-sized predecessors. Where most of the increase in display size comes from is in the reduction of bezel along the vertical axis. Compared to the Pixel 2 XL, which also has a 6-inch display, the Pixel 5 does feel much smaller. In terms of screen resolution, the Google Pixel 5 contains 2340×1080 pixels, or about 432 pixels per inch. Past Pixels usually covered about 440 pixels per inch for the smaller variants, so this slight reduction in pixel density shouldn’t be noticeable compared to them. However, there are occurrences where I can notice color fringing when viewing the display closer-up, so a slightly higher screen resolution would be appreciated. I’m partial to Apple’s objective of targeting a specific pixel density instead (about 460 pixels per inch) and using a pixel resolution that satisfies it while maximizing pixel fill factor for optimal display power efficiency.
The display panel is sourced solely from Samsung Display, and the hardware seems to have been slightly upgraded from last year’s to accommodate a higher peak brightness. However, the display driver IC remains the same as that of the Pixel 4 XL’s (s6e3hc2), and the display panel itself seems to be an older-generation Samsung OLED. This puts the Google Pixel 5 behind other flagships that use Samsung’s newer generation of OLED in terms of peak output and power efficiency, but it should give Google a chance to refine their display in other areas, which I explore later on. In any case, a polished display with little-to-no drawbacks will yield a better user experience than a display with slightly more output but with notable flaws. In my experience, I have observed that Samsung Display’s newer OLEDs run into much more quality control issues than previous generations, so perhaps Google’s decision to skip this generation can be viewed as a positive.
Methodology for gathering data
To obtain quantitative color data from the display, I stage device-specific input test patterns to the Google Pixel 5 and measure the display’s resulting emission using an X-Rite i1Display Pro metered by an X-Rite i1Pro 2 spectrophotometer in its high-resolution 3.3nm mode. The test patterns and device settings I use are corrected for various display characteristics and potential software implementations that may alter my desired measurements. My measurements are typically done with display-related options disabled unless mentioned otherwise.
I use constant power patterns (sometimes called equal energy patterns), correlating to an average pixel level of about 42%, to measure the transfer function and grayscale precision. It’s important to measure emissive displays not only with constant average pixel level but also with constant power patterns since their output is dependent on the average display luminance. Additionally, a constant average pixel level does not inherently mean constant power; the patterns I use satisfy both. I use a higher average pixel level closer to 50% to capture a midpoint between both the lower pixel levels and the many apps and webpages with white backgrounds that are higher in pixel level.
I use the latest color difference metric ΔETP (ITU-R BT.2124), which is an overall better measure for color differences than ΔE00 that is used in my earlier reviews and is still currently being used in many other sites’ display reviews. Those that are still using ΔE00 for color error reporting are encouraged to use ΔEITP.
ΔEITP normally considers luminance (intensity) error in its computation, since luminance is a necessary component to completely describe color. However, since the human visual system interprets chromaticity and luminance separately, I hold our test patterns at a constant luminance and do not include the luminance (I/intensity) error in our ΔEITP values. Furthermore, it is helpful to separate the two errors when assessing a display’s performance because, just like with our visual system, they pertain to different issues with the display. This way, we can more thoroughly analyze and understand the performance of a display.
Our color targets are based on the ITP color space, which is more perceptually-uniform than the CIE 1976 UCS with much better hue-linearity. Our targets are spaced out roughly even throughout the ITP color space at a reference 100 cd/m2 white level, and colors at 100%, 75%, 50%, and 25% saturation. Colors are measured at 73% stimulus, which corresponds to about 50% magnitude in luminance assuming a gamma power of 2.20.
Contrast, grayscale, and color accuracy are tested throughout the display’s brightness range. The brightness increments are spaced evenly between the maximum and minimum display brightness in PQ-space. Charts and graphs are also plotted in PQ-space (if applicable) for proper representation of the actual perception of brightness.
ΔETP values are roughly 3× the magnitude of ΔE00 values for the same color difference. A measured color error ΔETP of 1.0 denotes the smallest value for a just-noticeable-difference for the measured color, while the metric assumes the most critically-adapted state for the observer so as not to under-predict color errors. A color error ΔETP less than 3.0 is an acceptable level of accuracy for a reference display (suggested from ITU-R BT.2124 Annex 4.2), and a ΔETP value greater than 8.0 can be noticeable at a glance, which I’ve tested empirically.
HDR test patterns are tested against ITU-R BT.2100 using the Perceptual Quantizer (ST 2084). HDR sRGB and P3 patterns are spaced out evenly with sRGB/P3 primaries, an HDR reference white level of 203 cd/m2 (ITU-R BT.2408), and a PQ signal level of 58% for all its patterns. All HDR patterns are tested at an HDR-average 20% APL with constant power test patterns.
Color profiles
The Pixel 5 maintains Google’s standard three color profiles: Natural, Boosted, and Adaptive, with Adaptive being the default profile out-of-the-box.
Color gamut for Google Pixel 5
All three color profiles share the same exact white point, which I measured at 6400 K for my Pixel 5. The tone mapping of the profiles is also identical, which targets the standard gamma power of 2.20. The only difference between the profiles is in the color primaries of their target color space:
The Adaptive profile, which is the default color profile for the Google Pixel 5, targets a color space with red and green primaries that extend past that of sRGB but are short of DCI-P3. Pure blues are similar between all three profiles, which all share the same sRGB-blue primary. The name of the profile is a misnomer in that there’s nothing “adaptive” about it. This naming may lead many users to believe that the profile switches color spaces depending on the content being viewed. However, this is not the case at all; the Adaptive profile is similar to the Vivid profile found in other Android phones, which just increases the color saturation for all generic content.
The Natural profile is the phone’s color-accurate profile, which targets the sRGB color space for generic content. The profile supports Android’s color management system, which allows the profile to render content with colors up to DCI-P3.
The Boosted profile is similar to the Natural profile but with slightly boosted colors for each color primary. Google says that the profile increases color saturation by 10% in every direction, although I haven’t actually measured how accurate this description is.
As an important note for users of the Pixel 2 and Pixel 3, the Saturated and Adaptive profiles of those phones have a cooler white point compared to the Adaptive profile found in the Pixel 4 and later. While the Saturated and Adaptive profiles of the Pixel 2 and Pixel 3 were calibrated to roughly a 7000 K white point, the Pixel 4 and later target the industry standard at 6500 K, which will appear warmer. Unfortunately, Google doesn’t provide an option to manually adjust the color temperature of the white point for those that prefer colder white points, but the silver lining is that humans can adapt to pretty much any white point, and there are benefits to being accustomed to the standard D65 white point over a colder one.
Brightness
Google’s previous Pixel devices have generally underwhelmed when it came to peak display brightness. For many people, the maximum brightness of a display is one of the most important specs, if not the most important spec to look for in a display. After all, a phone is of no use if the display isn’t legible. In a world where smartphones are touting 700-800 nits of full-screen display brightness (at 100% APL), Google unleashed its flagship, the Pixel 4, which was only able to muster 450 nits. Thus, display brightness had become one of the banes of the Pixel line.
An update to the Pixel 4 series brought the devices closer to their competitors by finally implementing their display panels’ high brightness modes. This boosted the peak full-screen brightness from 450 nits to 550-600 nits, which was still considered conservative for a flagship at the time it was released and mediocre by today’s standards. So, to be competitive with future devices, Google had some catching up to do.
Measured Luminance vs. APL for Google Pixel 5
Here, the term “average pixel level”, or APL, is synonymous with the area of lit pixels on the display expressed as a percentage of the total display area. Emissive displays, like OLED, vary in brightness depending on the intensity and the area of pixels it emits. “Measured Luminance vs. Display Area” or “Measured Luminance vs. Window Size” would both be better-fitting names for the chart since the APL metric can entail many other circumstances, but APL has been colloquially used and is generally understood when discussing display brightness.
For the Pixel 5, Google brings modest improvements to the display brightness. At its 50% APL midpoint, I measured the Google Pixel 5 to peak at about 750 nits with auto-brightness (470 nits for manual max system brightness), which are values that are on par with its competitors in their calibrated color modes. However, at higher APLs, the Google Pixel 5 demonstrates inferior performance compared to the competition: At 80% APL, which is about the APL of light-themed apps, the Pixel 5 only outputs about 680 nits, whereas competitors can reach about 800 nits. This brightness performance for the Pixel 5 places it about halfway between the Pixel 4 and its competitors, which seems lackluster for a flagship smartphone in 2020. Minimum brightness measures white at 1.9 nits, which is the same as most competitors.
Despite the Google Pixel 5 still being behind others in maximum output, the good news is that I find that the brightness of this Pixel is finally bright enough for it to be decently legible under most sunny conditions. In circumstances where the display brightness wouldn’t be satisfactory, such as under direct California summer sunlight, then even the LG G7 ThinQ’s 1,000 nits will not suffice.
Nevertheless, extra brightness headroom is important for improving display tone mapping accuracy and consistency. Ultimately, a display is heavily restricted by its full-screen/100% APL brightness, which is 650 nits for the Google Pixel 5. A higher-brightness panel that can output 800 nits at 100% APL, like those found in other flagships, would allow a higher-precision calibration at 650 nits. We see that the peak brightness of the Google Pixel 5 varies significantly with on-screen APL, dropping in brightness as on-screen APL increases. Because of this, we can expect the tone mapping performance to also vary with on-screen APL; the inverse-proportional relationship of luminance vs. APL should mean picture contrast will increase with on-screen APL, which makes display calibration complicated at these brightness levels. Below high brightness mode, which ranges from 1.9 to 470 nits on the Pixel 5, Google keeps display luminance constant regardless of on-screen APL, which allows the company to calibrate the display with high precision. But at maximum brightness, Google tries to extract as much output from the panel at lower APLs at the cost of calibration consistency.
Finally, for Google’s sake in its camera and “helpful”-focused marketing campaign, a higher peak brightness would be indispensable in improving the accuracy of the camera viewfinder when capturing photos outdoors, and it would make the Pixel camera’s exposure and tone-map controls more useful.
Contrast and Tone Mapping
I can’t overstate the importance of display tone mapping and contrast, along with actually assess it correctly—the advent of the Perceptual Quantizer gives us the best look at luminance measurements. I consider display tone mapping to be the most important aspect of a display, and a display with bad tone mapping absolutely ruins the experience for me. Bad tone mapping can result in crushed shadows, colors that are too dark, and/or a washed-out display. Luckily for me, all three profiles on the Google Pixel 5 share the same tone mapping, which makes evaluating this part simple. There is a slight difference between the tone mapping in the 90 Hz and 60 Hz modes, but most of the differences come from color hue, so I’ll only be covering 90 Hz below while I’ll cover 60 Hz in the next section.
Tone mapping for Google Pixel 5 @ 90 Hz; 42% APL ≈ 20% ADL
We have a better depiction of the perceptual contrast and the display’s variation when viewing the tone mapping with PQ-scaled and normalized axes. PQ stands for Perceptual Quantizer, which is currently our best perceptually- linear mapping of the magnitude of luminance to the stimulus of perceived brightness for the human eye. The term “average display luminance”, or ADL, refers to the average expected luminance over the total area of the display, expressed as a percentage of the maximum possible value, which is the luminance of full-screen white.
The tone mapping of the Pixel 5 targets the standard gamma power of 2.20 (except for in high brightness mode), which is a necessary baseline for accurate color tones and image contrast. And for the most part, we see that Google Pixel 5 does accurately track the 2.20 gamma power, with a few hitches.
First, the trace that stands out the most is the max-brightness tone map curve in red. We see that its tone mapping seems to render color tones significantly lighter than the standard 2.20 gamma power, so one may expect the Google Pixel 5 to appear too light and washed out at max brightness. However, the Pixel 5’s max brightness is only viewed during really bright conditions, and ambient lighting is directly related to the perceived contrast of a display. When the ambient lighting is much brighter than the display brightness, color tones on the display will appear relatively darker, so to compensate, the display can make color tones lighter to counteract the ambient lighting. This is the same principle as increasing the display brightness to make the display more legible; when you increase the display brightness, you increase the perceived contrast of the display. However, if the display has reached its peak brightness, the only other option is to increase the lightness of color tones, which is what the Pixel 5 is doing here. This tone map curve shows a good understanding of the concept of perceived contrast by Google, so this behavior deserves recognition. However, as mentioned in the previous Brightness section, the Google Pixel 5 is handicapped by its peak full-screen brightness, so it varies its luminance with APL to maximize content brightness. This results in the max-brightness tone map curve to become steeper and darker at higher APLs, such as in light-themed apps, which reduces the effectiveness of the lighter color tones.
On the opposite end of the brightness spectrum, the lower-brightness tone map curves show some problematic behaviors:
Our 20% PQ-brightness tone map curve in pink, which is associated with a white level of about 10 nits, shows the Pixel 5 rendering colors too light across its entire grayscale. Unlike the tone map curve at max brightness, the behavior at this brightness is undesirable. In general, people keep their display brightness a relatively fixed difference brighter or dimmer than the brightness of their surroundings, and the two brightnesses are usually within the same ballpark. Therefore, the display tone mapping should be consistent throughout a display’s brightness range, with the exception of the extremities (max and minimum brightness), since the display might not be able to get bright or dim enough to satisfy the user’s preference.
At minimum brightness, the Pixel 5’s tone map curve (in blue) shows a response that tracks the gamma power of 2.20 very closely, and there’s a slight lift near black to ensure that the display doesn’t clip shadows. Typically, this would be great tone map behavior, but, opposite to the edge-case at maximum brightness, we have to consider that the brightness of the surrounding ambient light can be much dimmer than the white level of the Pixel 5’s minimum brightness (1.9 nits). A dark room in a house will typically have an illuminance below 0.1 lux, sometimes even under 0.01 lux for a room without any active light sources. Viewing a patch of white on a 1.9 nit display in these conditions is similar to viewing it on an 800-1000+ nit display in typical office lighting (~200 lux), which is uncomfortable and eye-searing for many people. This is why dark mode is pretty much mandatory for night-time viewing unless you hate your eyeballs. If the display is too bright compared to the ambient lighting and the display can’t get any dimmer, then the display should make color tones darker to compensate. But here with the Pixel 5’s minimum-brightness tone map curve, its 2.20 gamma power response may appear too light and washed out in dark environments. The ideal behavior would be to adapt the tone map curve to the ambient lighting, but so far there have been no phones that I know of that exhibit this behavior.
The Pixel 5's OLED panel exhibits zero black crush throughout its brightness range.
Besides these two issues, there’s one item that sets the Google Pixel 5 apart from most other displays: The Pixel 5’s OLED panel can render its first step gray (#010101) throughout its entire brightness range — in other words, zero black crush from the display — which is a feat that I’ve only measured iPhones to perform until now.
White Balance and Grayscale Precision
R.I.P. AmbientEQ
![]()
Grayscale spread for Google Pixel 5, Natural profile
As an aside, it’s important to understand that correlated color temperature is not a reliable metric for gauging white point accuracy, as it’s only an ordinal estimate of how warm or how cold a light source appears; a 6300 K light source can be more accurate to the D65 illuminant than a 6400 K light source if, for example, the 6400 K light source receives too much contribution from green to appear colder. The color difference metric ΔETP between the measured white point and D65 along the daylight locus is currently the best indicator of white point accuracy.
Google shares the same white point between all three color profiles, similar to its tone mapping, which again simplify my measurements and assessments.
Our Pixel 5 measures fantastically accurate with respect to its white point. Color error ΔETP measurements range from 0.5 to 1.2 throughout the Pixel 5’s brightness range, with an average correlated color temperature of 6400 K. This is accurate to the D65 standard and notably closer than some other flagships I’ve measured, which generally trend towards 6300 K in their calibrated display mode. The consistency of the Pixel 5’s white point measurement is also notably excellent.
What’s more impressive is that our Pixel 5 unit demonstrates a fairly tight grayscale calibration. From my measurements, the tint of all the grays reports a color error ΔETP less than 3.0 from the average color of gray for its respective display brightness. This is the case all throughout the Pixel 5’s brightness range. This means that, for any single given display brightness, our Pixel 5 unit showed no signs of different tints of grays, which would usually be most noticeable when viewing dark-themed apps with multiple layers in the interface. This feat is very rare among Android displays, including the displays of Samsung Galaxy flagships. Note that this doesn’t mean that the Google Pixel 5 has no tinting with respect to D65, just that the color of gray maintains the same tint for a given system brightness.
On that note, there is some gray tinting that may be noticeable between the different brightness settings. Our aggregated chart, which combines the grayscale plots throughout the Pixel 5’s brightness range, shows some spread in the darker tones between green and magenta that is outside the average region. We can see that the grayscale is tinted slightly green between 60% and 20% PQ-brightness, and this hue shift may be visible when adjusting to these brightness settings from other brightness settings. It’s not significant on our unit, and it’s much better than what I’ve seen from other displays, but it’s present and may vary in intensity depending on the manufacturing variance of your device.
The Google Pixel 5 is in its own league when it comes to near-black tone rendering
What’s interesting is that the minimum-brightness grayscale calibration is absolutely outstanding — might I say, it’s perfectly calibrated, with color errors ΔETP and spread less than 1.0. I’m mentioning this since minimum-brightness calibration is usually the most difficult since we’re working against a lot of noise at signals this low; this was obviously a focus by Google, especially considering their previous Pixels lacked performance here. This feat, as well as the total lack of black clipping, puts the Pixel 5 in its own league (alongside the iPhone) when it comes to near-black tone rendering.
Refresh rate color difference
The Smooth Display feature of the Google Pixel 5 will switch from 90 Hz to 60 Hz when the display is static or when playing ≤60 FPS content. If the display brightness is below 25 nits (14/255 brightness setting), the Pixel 5 will stay fixed at 90 Hz. In high refresh rate displays, there can be noticeable differences in color calibration between the 60 Hz and the 90/120 Hz modes.
Grayscale difference between 120 Hz and 60 Hz
The figures above switch between the 90 Hz plots and the 60 Hz plots above 25 nits, showing the color difference when the Google Pixel 5 switches into its 60 Hz display mode. We see a slight shift towards green for midtones and darker colors, but from my usage, the shift was barely visible. These differences are vastly less significant than what was seen on the Pixel 4/4 XL or the OnePlus 8 Pro. As always, manufacturing variances play a large role, and another Pixel 5 unit can have results much different than what we’ve measured on ours.
Color Accuracy
![]()
sRGB color accuracy plots for Google Pixel 5, Natural profile
Google Pixel devices have typically performed quite well in color accuracy in their calibrated display mode, so I expected the Pixel 5 to have no issues with it. However, while the color accuracy on the Pixel 5 isn’t bad per se, I was surprised to see some of the errors that I’ve found.
Below 40% PQ-brightness, we start to see gamut and saturation compression, with the most problems around 20% PQ-brightness. Combined with the lighter tone mapping and contrast found at this point, the Google Pixel 5 does appear slightly more washed out at this display brightness. The issue isn’t as prevalent at minimum brightness, but the Pixel 5’s weak color rendering at 20% PQ-brightness is a disappointment.
At max brightness (high brightness mode), the Pixel 5 shows hue errors in reds and oranges, which can cause the appearance of skin tones to appear too red. High-saturation purples are also tinted far too blue. There’s a slight oversaturation across the gamut, but this is desirable behavior for high brightness mode to counteract some of the gamut compression caused by high ambient lighting.
Between 60% and 80% PQ-brightness (90–250 nits), which covers the display luminance range for reference viewing environments, the Pixel 5’s color accuracy is good with no noteworthy color errors.
![]()
P3 color accuracy plots for Google Pixel 5, Natural profile
The Pixel 5’s Display P3 color accuracy is fairly similar to its sRGB color accuracy, with similar color error characteristics, so it’s decent. There is still barely any non-HDR P3 content on Android, and Android cameras still capture colors in sRGB, so these measurements aren’t too useful at the moment. This may change in the future, so it’s still useful to have decent P3 accuracy for future-proofing.
HDR Playback
The foundation of color reproduction begins with contrast, which, for HDR content, dominantly follows the ST.2084 PQ curve. And oh does the Pixel 5 perform: Its display follows the PQ curve with textbook precision, all the way up to its peak brightness, which is about 700 nits for HDR content. There’s also a tiny lift near black to ensure that blacks aren’t clipped. I really don’t have much else to say here about the Pixel 5’s HDR contrast response — just look at how cleanly it traces its target. This is measured at 20% APL with constant display power, and many higher-end consumer TVs don’t have PQ responses nearly this rigid (usually because they have much greater power limitations).
However, just like with all other Androids, HDR10 tone mapping is flawed. Even with proper 1K or 4K max-luminance metadata, Android ignores it and tone maps with a peak brightness roll-off up to 100% PQ signal level. HDR10 content maxes out at 1,000 nits, so the display shouldn’t be tone mapping past 1,000 nits, which is at 75% PQ signal level. At 75% PQ signal level, the Pixel 5 only outputs 560 nits, which means that 560 nits, and not 700 nits, is effectively the Pixel 5’s peak brightness for HDR10 content. All Androids seem to be affected by this issue, so Google is responsible for it.
The peak brightness can be a weakness, which falls slightly short of the 1,000 nits that the HDR10 standard is capable of delivering. However, this will only be an issue if the content that is being viewed contains highlights that exceed 700 nits, which currently isn’t too common for most shows and films. Furthermore, the difference between 700 nits and 1,000 nits for small specular highlights isn’t actually that stark (but Dolby Vision’s 2,000+ nits will do you in). However, because of the HDR10 tone mapping issue, HDR highlight performance suffers.
DCI-P3 color accuracy on the Pixel 5 is fantastic, which is surprising to see since its normal Display P3 accuracy isn’t nearly as impressive. The average color error ΔETP across the entire DCI-P3 gamut is less than 3.0, which is acceptable performance for a reference display. There are only two points that I can nitpick, which are at 100% red and 100% blue, but these maximum errors are relatively minor.
Unfortunately, the Google Pixel 5 doesn’t support Dolby Vision, rather only HDR10 and HDR10+ (the latter of which currently seems like a dead standard). If a display’s HDR10 playback quality is good, then Dolby Vision’s omission wouldn’t be a big deal since Dolby Vision content provides an HDR10 base layer. But without Dolby Vision support, we’re stuck with Android’s incompetent HDR10 tone mapping.
Final Remarks on the Pixel 5’s Display
The Google Pixel 5 has a very good display without state-of-the-art panel hardware, and it’s Google’s best display yet. That saying usually causes some eye rolls among readers, because why wouldn’t the latest flagship be the best? Many products can usually regress in some aspects over a revision. But in this case, Google has garnished its flagship with a great display with welcome improvements without making me think “what the hell?” at a deficiency.
The Pixel 5 may not have state-of-the-art panel hardware, but it's a contender for one of the best displays this year
I’ll take that back for a second: I do miss AmbientEQ, and I think that automatic display white balance is a great feature. However, I’m fully content to have a display without it so long as it has a D65 white point accuracy as accurate as on my Pixel 5, although I’m sure others may want an option to adjust the white balance.
Back to my point: From my time reviewing this phone, there hasn’t been one stand-out issue that made me wish I was using a different display. Matter of fact, the Google Pixel 5 has one of the least problematic displays I’ve used as of late. No harsh tinting of dark color tones, no bothersome flickering when switching refresh rates, no panel uniformity issues, no huge calibration missteps to scratch my head at (although there is the HDR10 tone mapping issue). The OnePlus 8 Pro, with its superior display hardware, is unusable for me due issues with all the above. I have very high sensitivity when it comes to panel blemishes; it’s possible I just got lucky, but the panel on my Pixel 5 is pristine and clean from imperfections.
I usually don’t talk about panel uniformity just due to the unreliability of extrapolating from one retail unit, but I felt the need to point it out since this year, almost all the phones I’ve reviewed have had panel imperfections. Google was the last OEM I was expecting to receive a perfect panel from. And from the black crush tragedy known as the Pixel 2 XL, the near-black performance of the Pixel 5 blew my mind. This was a very deliberate calibration shift and focus on shadow tone control from Google. The Google Pixel 4 (non-XL) gave us the first hint of this type of performance, but I was hesitant about its staying power since the Pixel 4 XL did not perform the same. I was worried that this might have just been a fluke of the Pixel 4’s LG panel versus the Pixel 4 XL’s Samsung panel, but seeing that it has improved and carried onto the Samsung display of the Pixel 5, which shares the same DDIC as the Pixel 4 XL, makes me confident that this is Google’s doing.
It seems like the general consensus of the Google Pixel 5 is that it’s a genuine refinement over previous Pixel phones. Google is doing the best they can with parts that they’re familiar with, and they continue to focus on aspects that constitute a practical smartphone. In the display department, the Pixel 5’s color tone performance has been refined to an extent that surpasses just about every other flagship. If Google’s factories are in your favor and your Pixel 5’s display performs similar to mine, then, despite not packing the latest Samsung panel, you have what I consider to be one of the most immaculate smartphone displays available. And according to XDA’s Adam Conway, you also get a stellar software experience, best-in-class camera software, and performance that defies its benchmark scores.

- The Pixel 5 may not have state-of-the-art panel hardware, but it has Google's best display yet.
|
Features: |
|
|
|
Pros: Cons: |
| Specification | Google Pixel 5 |
|---|---|
| Type |
Flexible OLED PenTile Diamond Pixel |
| Manufacturer | Samsung Display Co. |
| Size |
5.4 inches by 2.5 inches 6.0-inch diagonal 13.5 square inches |
| Resolution |
2340×1080 19.5:9 pixel aspect ratio |
| Pixel Density |
305 red subpixels per inch 432 green subpixels per inch 305 blue subpixels per inch |
| Distance for Pixel Acuity Distances for just-resolvable pixels with 20/20 vision. Typical smartphone viewing distance is about 12 inches |
<8.0 inches for full-color image <11.3 inches for achromatic image |
| Black Clipping Threshold Signal levels to be clipped black |
<0.4% @ max brightness <0.4% @ min brightness |
| Specification | Natural | Adaptive |
|---|---|---|
| Brightness |
Minimum:
1.9 nits
Peak 100% APL:
651 nits
Peak 50% APL:
749 nits
Peak HDR 20% APL:
696 nits
|
|
| Gamma Standard is a straight gamma of 2.20 | 1.89–2.22 | |
| White Point Standard is 6504 K |
6400 K
ΔETP = 1.0
|
|
| Color DifferenceΔETP values above 10 are apparent ΔETP values below 3.0 appear accurate ΔETP values below 1.0 are indistinguishable from perfect |
sRGB:
Average ΔETP = 3.9
P3:
Average ΔETP = 4.3
|
15% larger gamut than sRGB
+12% red saturation, slightly tinted orange
+25% green saturation
+5% blue saturation, slightly tinted cyan
|
The post Google Pixel 5 Display Review: Worthy of a Flagship appeared first on xda-developers.
from xda-developers https://ift.tt/33bb5FQ
via IFTTT